Connecting a Reolink RLC-510WA camera to TimelapseRobot
A step-by-step setup for the Reolink RLC-510WA: camera settings, FTP upload to TimelapseRobot and a reliable timelapse schedule.
Follow this guide for a clean Reolink RLC-510WA timelapse setup.
1. Set up your Reolink camera
- Download the Reolink app — install the free Reolink app from the Play Store.
- Power up the camera — plug the camera into a power socket.
- Connect to your network — use a LAN cable to connect the camera to your modem.
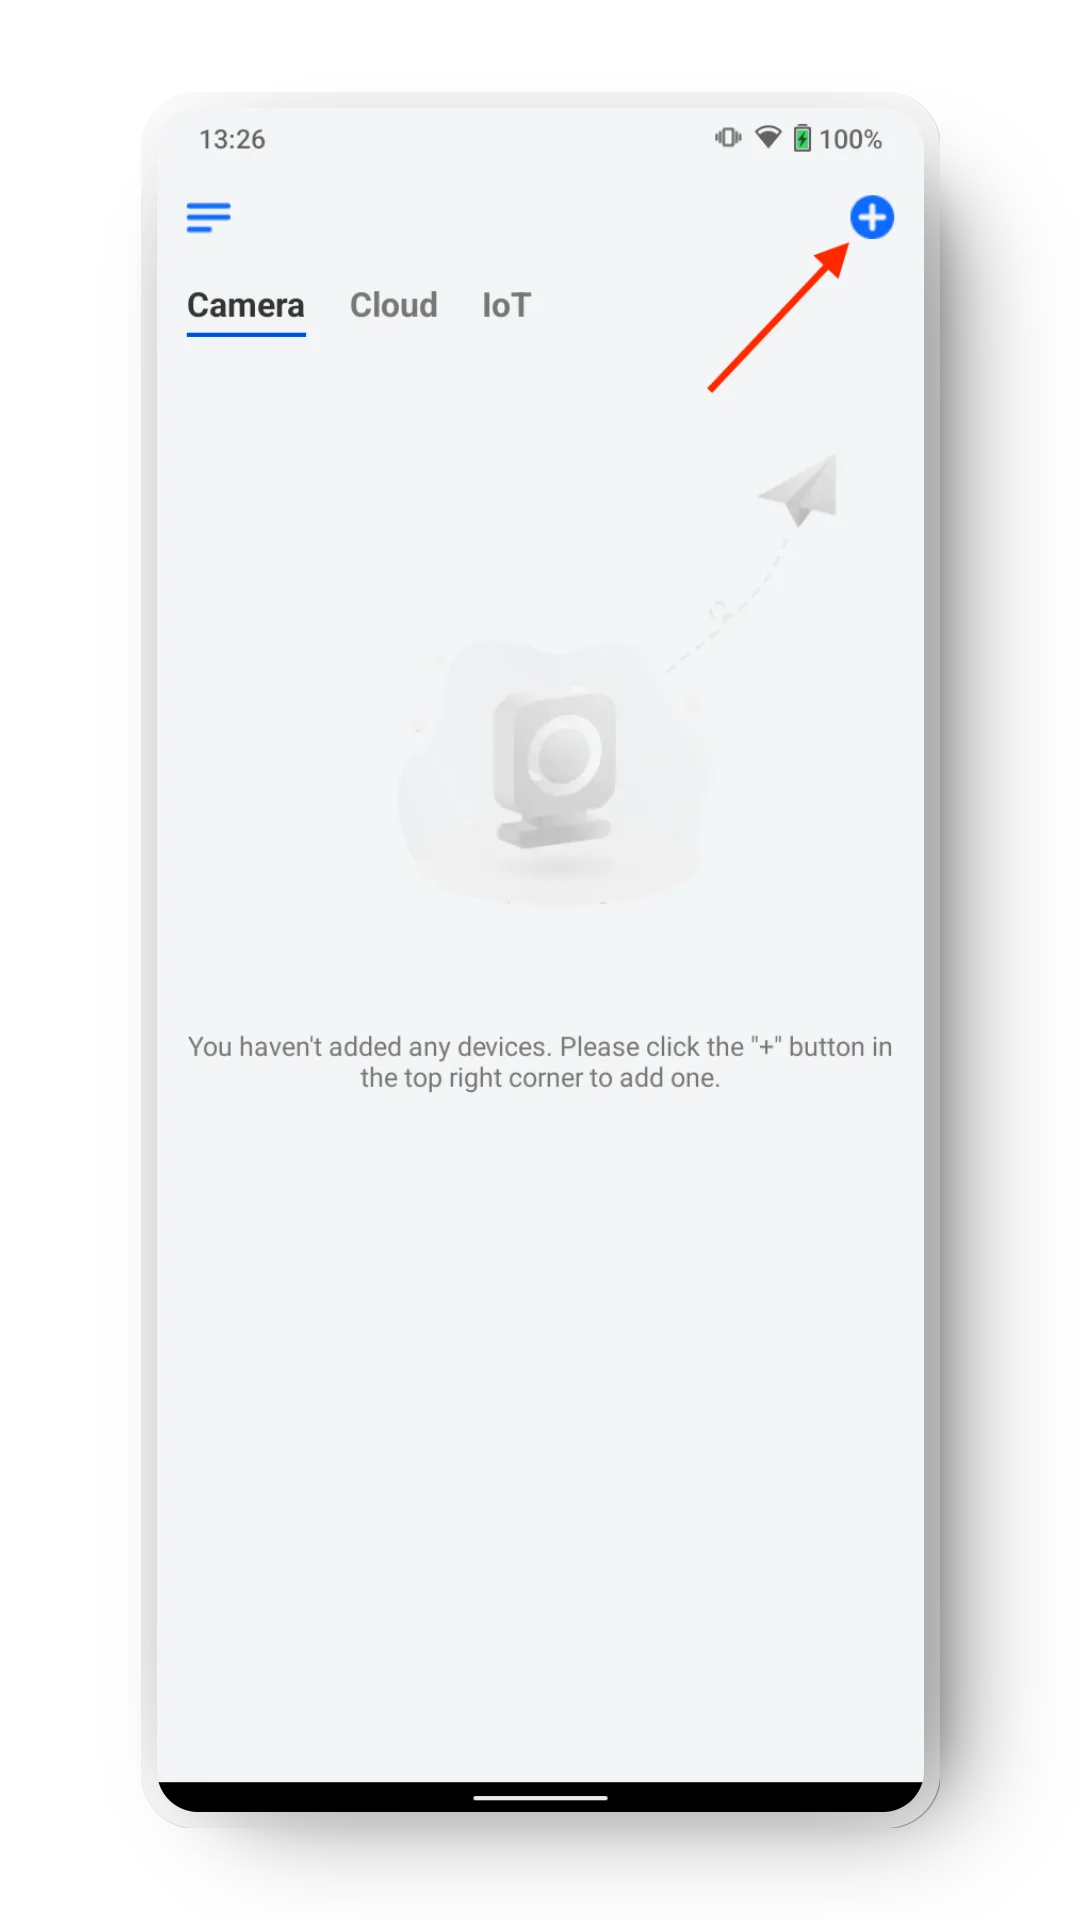
- Add the camera to the Reolink app — open the app, tap the plus icon in the top-right corner and scan the QR code on your camera.
- Set the camera login credentials — create a username and password for the camera (these are only for accessing the local camera hardware), then confirm the password.
- Name your camera — set a name for your device. Use letters and numbers only (no spaces).
2. Adjust the camera settings for timelapse use
Now that the camera is connected to the Reolink app, choose the best settings for timelapse use. Tap the Settings icon in the upper-right corner of your camera.
- Optional: add a Wi-Fi network — if you want to continue without the modem, connect your camera to a Wi-Fi network.
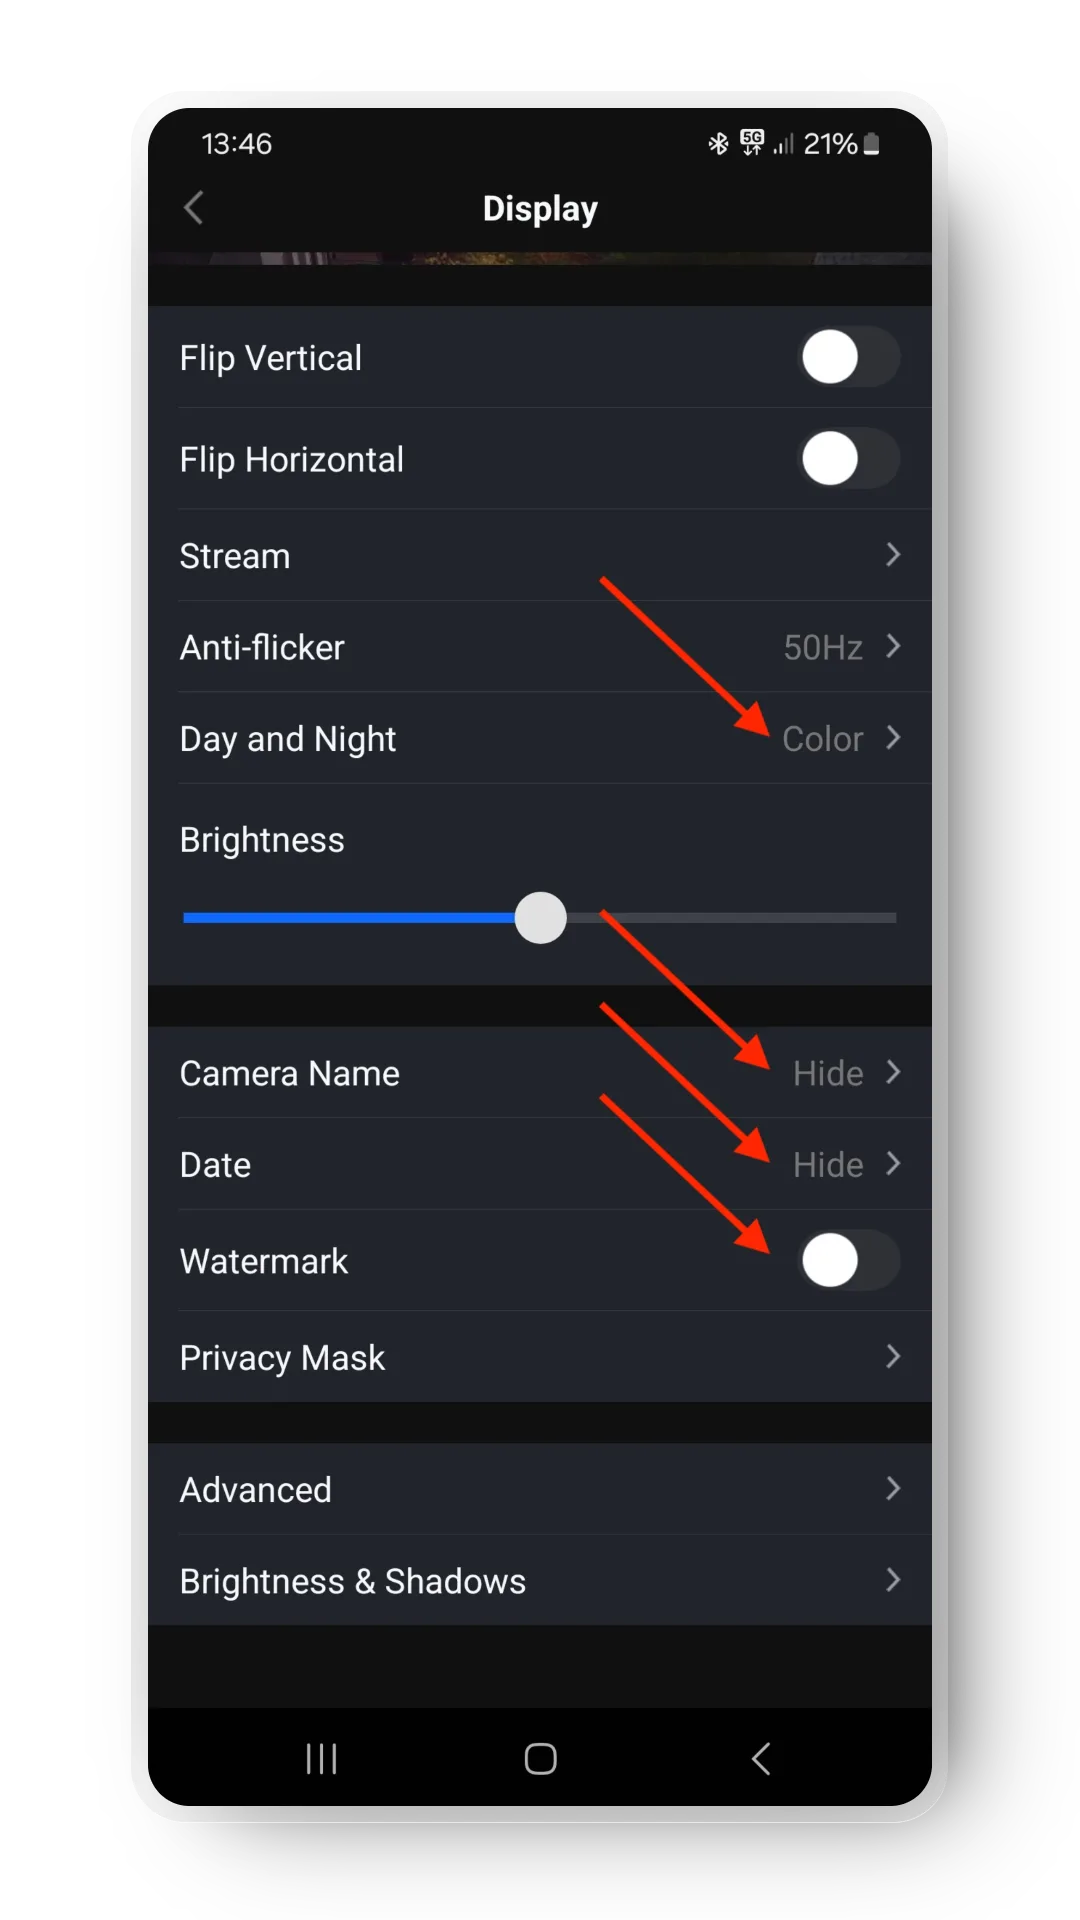
- Display settings — set "Day and Night" to Color so the image does not switch to black and white at night. Adjust the brightness as needed. Set the camera name and date to Hide. Deactivate the watermark.
- Light settings — set "Infrared Lights" to Stay Off.
- Detection alarm settings — go to Non-Detection Zone, select Paint All and tap Save.
- Disable camera recording and alerts — set camera recording to Off and email alerts to Off.
3. Configure the TimelapseRobot integration
- Log in to TimelapseRobot at my.timelapserobot.com.
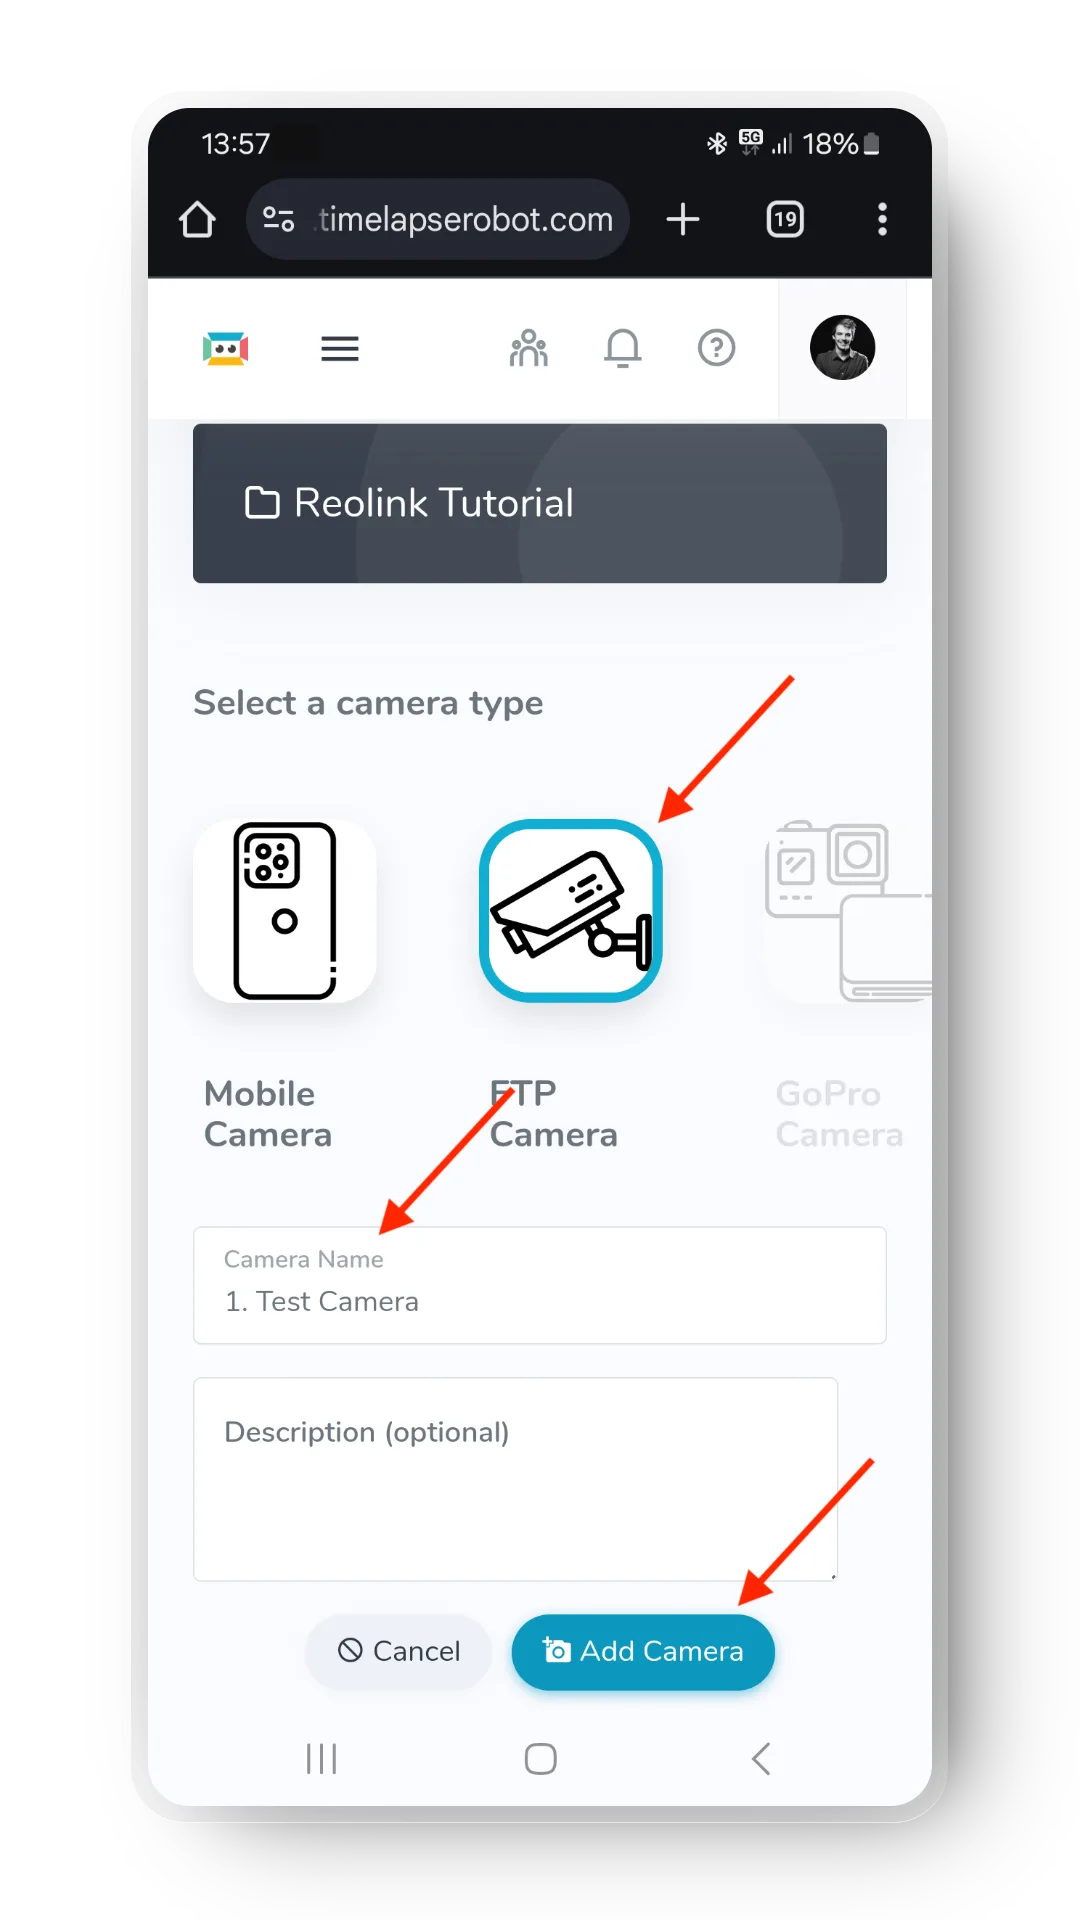
- Create a new project or open an existing one and click Add Camera.
- Select FTP Camera and set a camera name (it can match the one in Reolink, but that's optional).
- Choose your subscription plan.
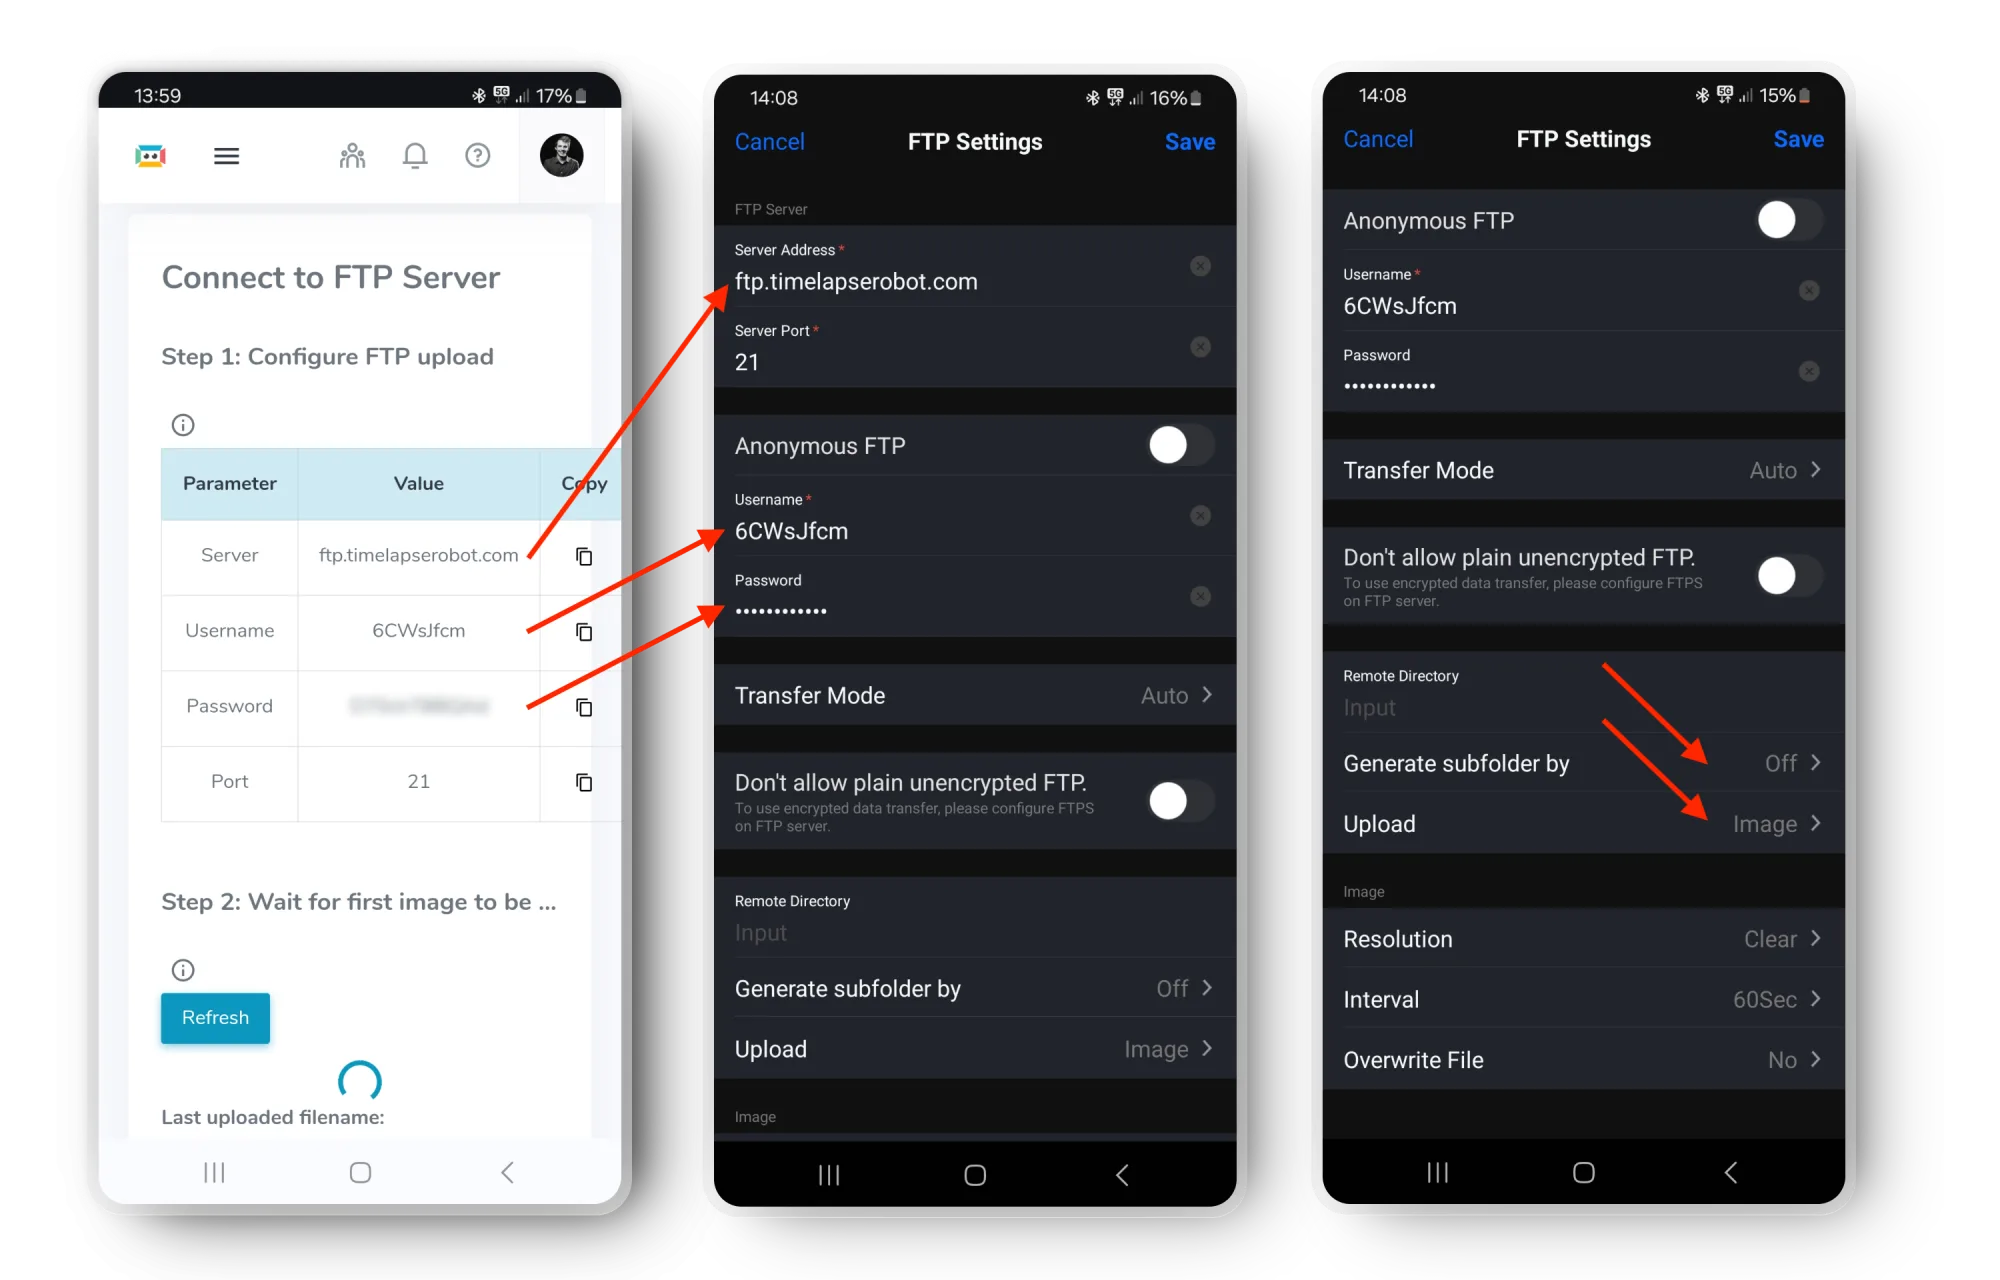
- Get the FTP credentials — in the next window you receive the login credentials for the FTP server your camera uploads to.
- Enter the FTP settings in the Reolink app — go to FTP → FTP Settings and copy the server address, username and password provided by TimelapseRobot. Then adjust:
- Set Generate subfolder by to Off.
- Set Upload to Image.
- Tap Save.
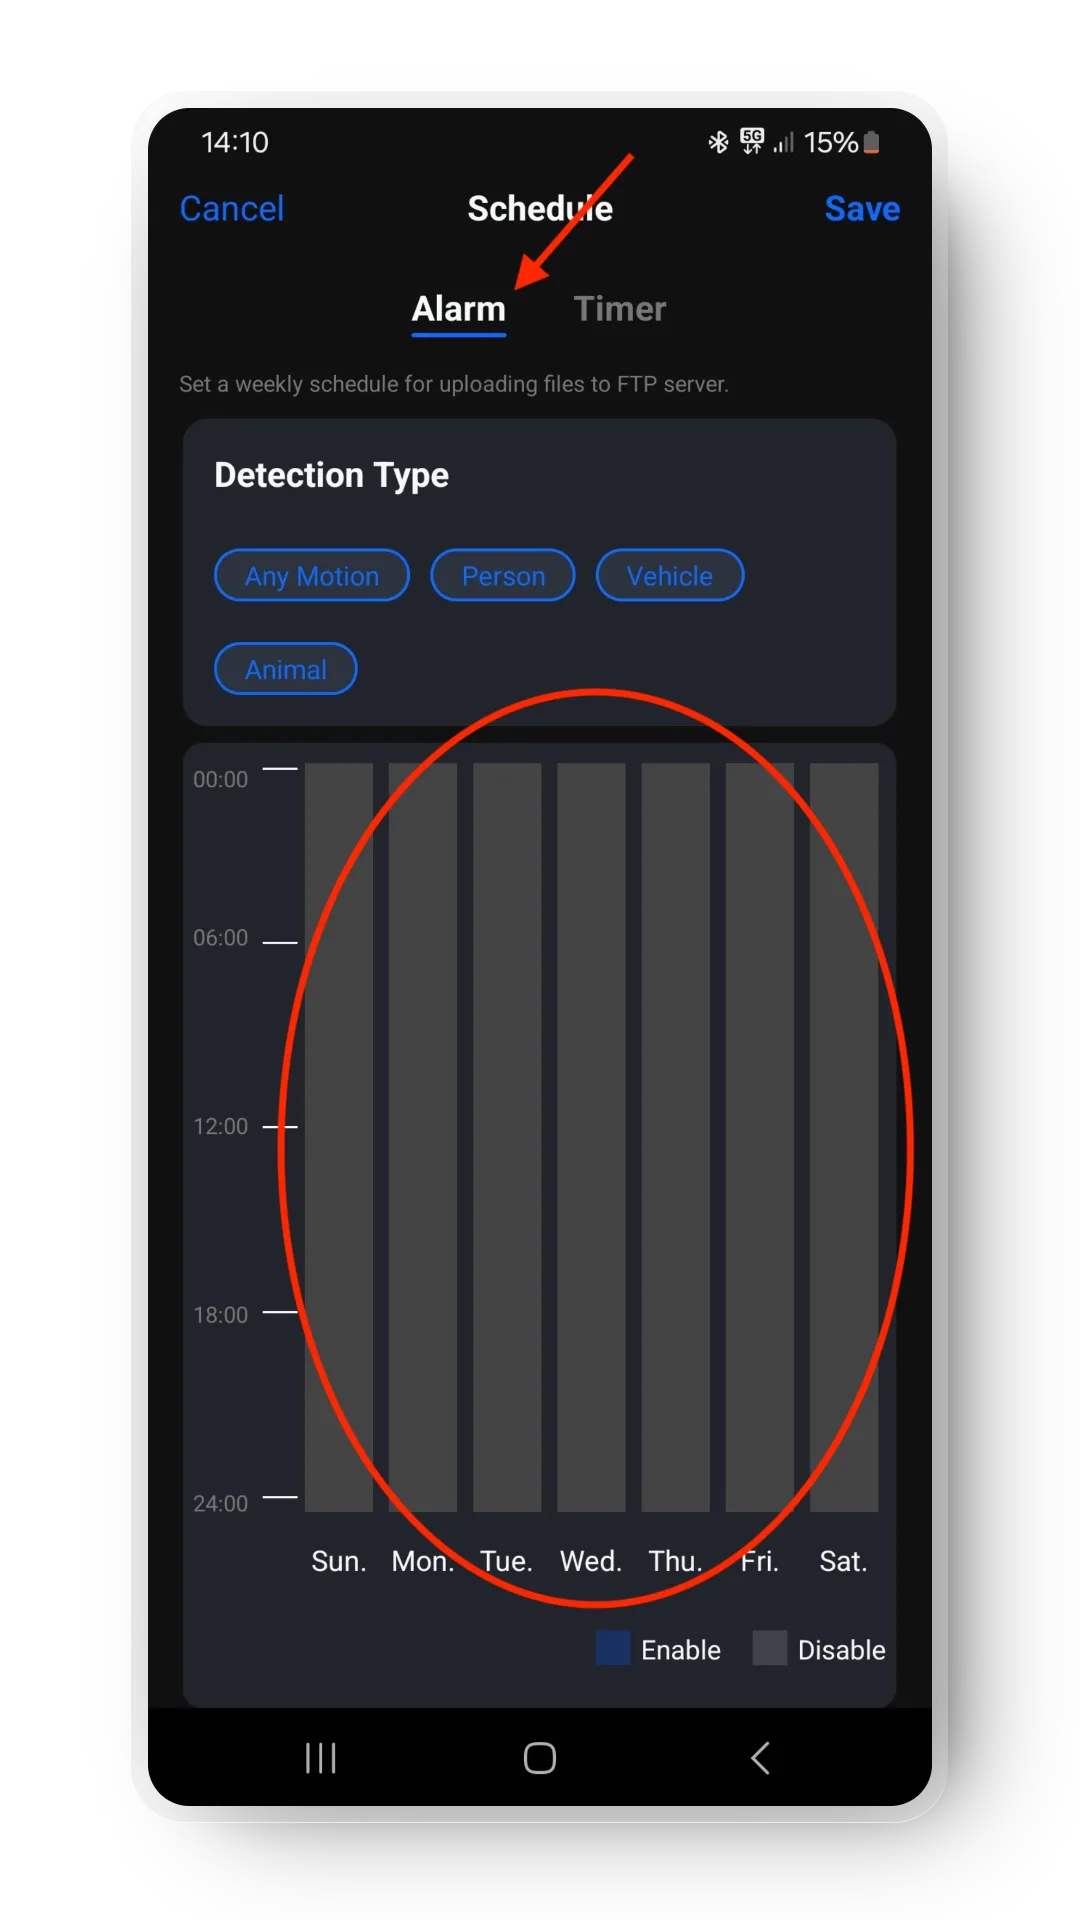
4. Set the upload schedule
Alarm tab — deactivate all days.
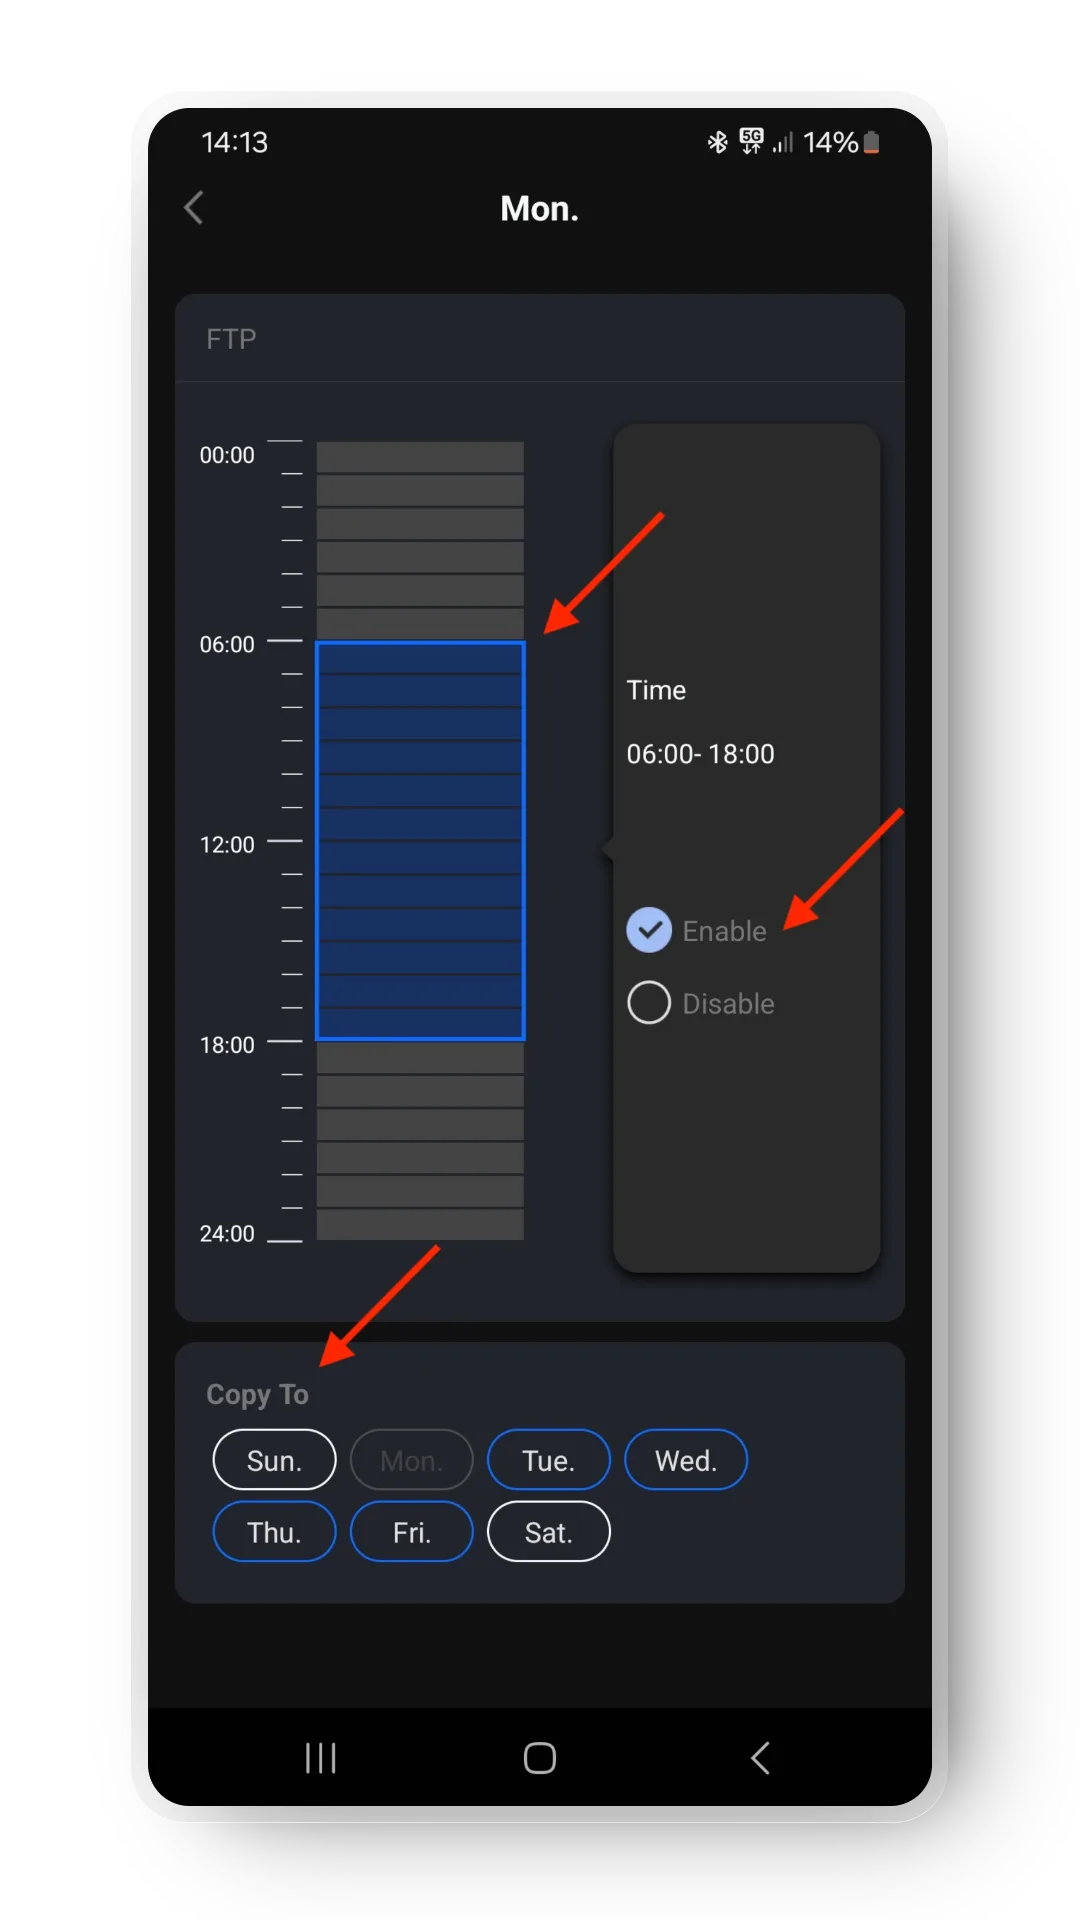
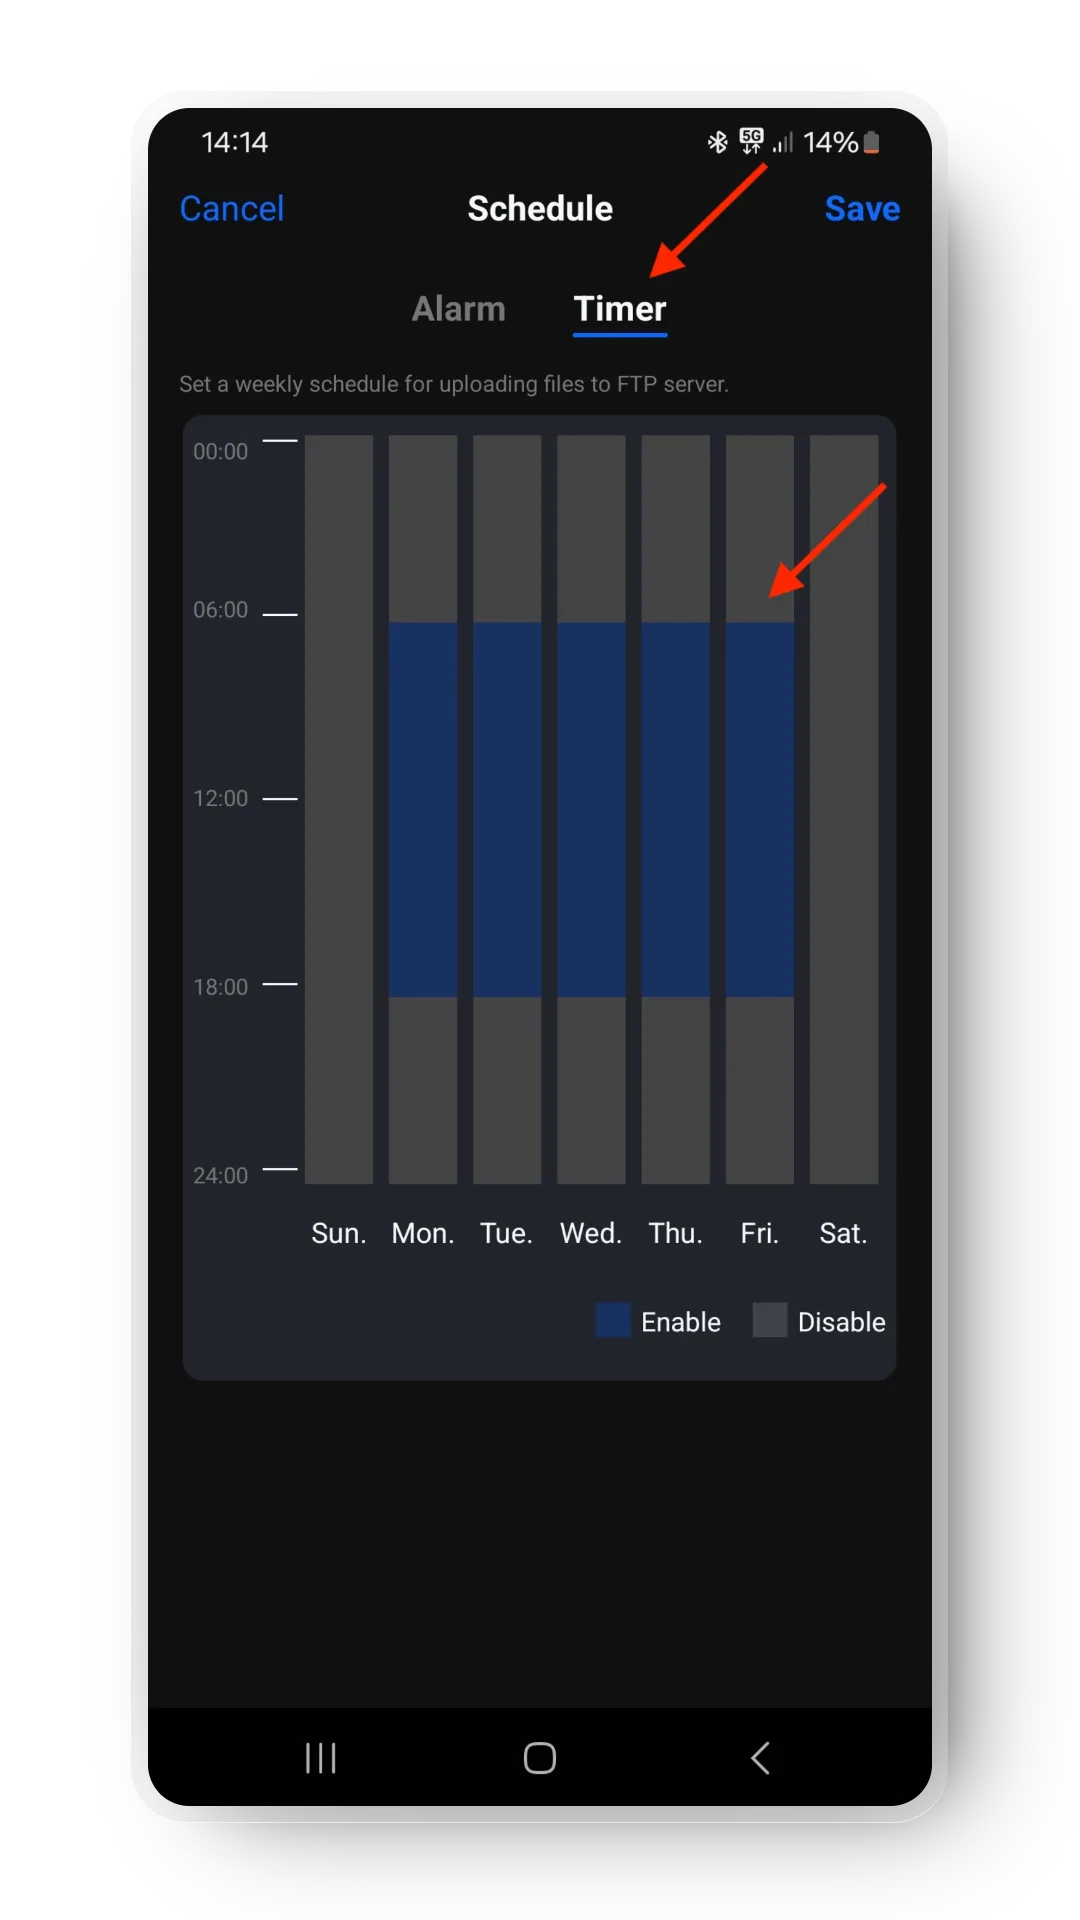
Timer tab — set the weekdays, start time and end time for each day you want to cover (e.g. Mon–Fri, 6 am–6 pm). Note that the calendar view starts with Sunday. Make sure your current day and time are covered initially so the camera uploads photos immediately — you can deactivate this later.
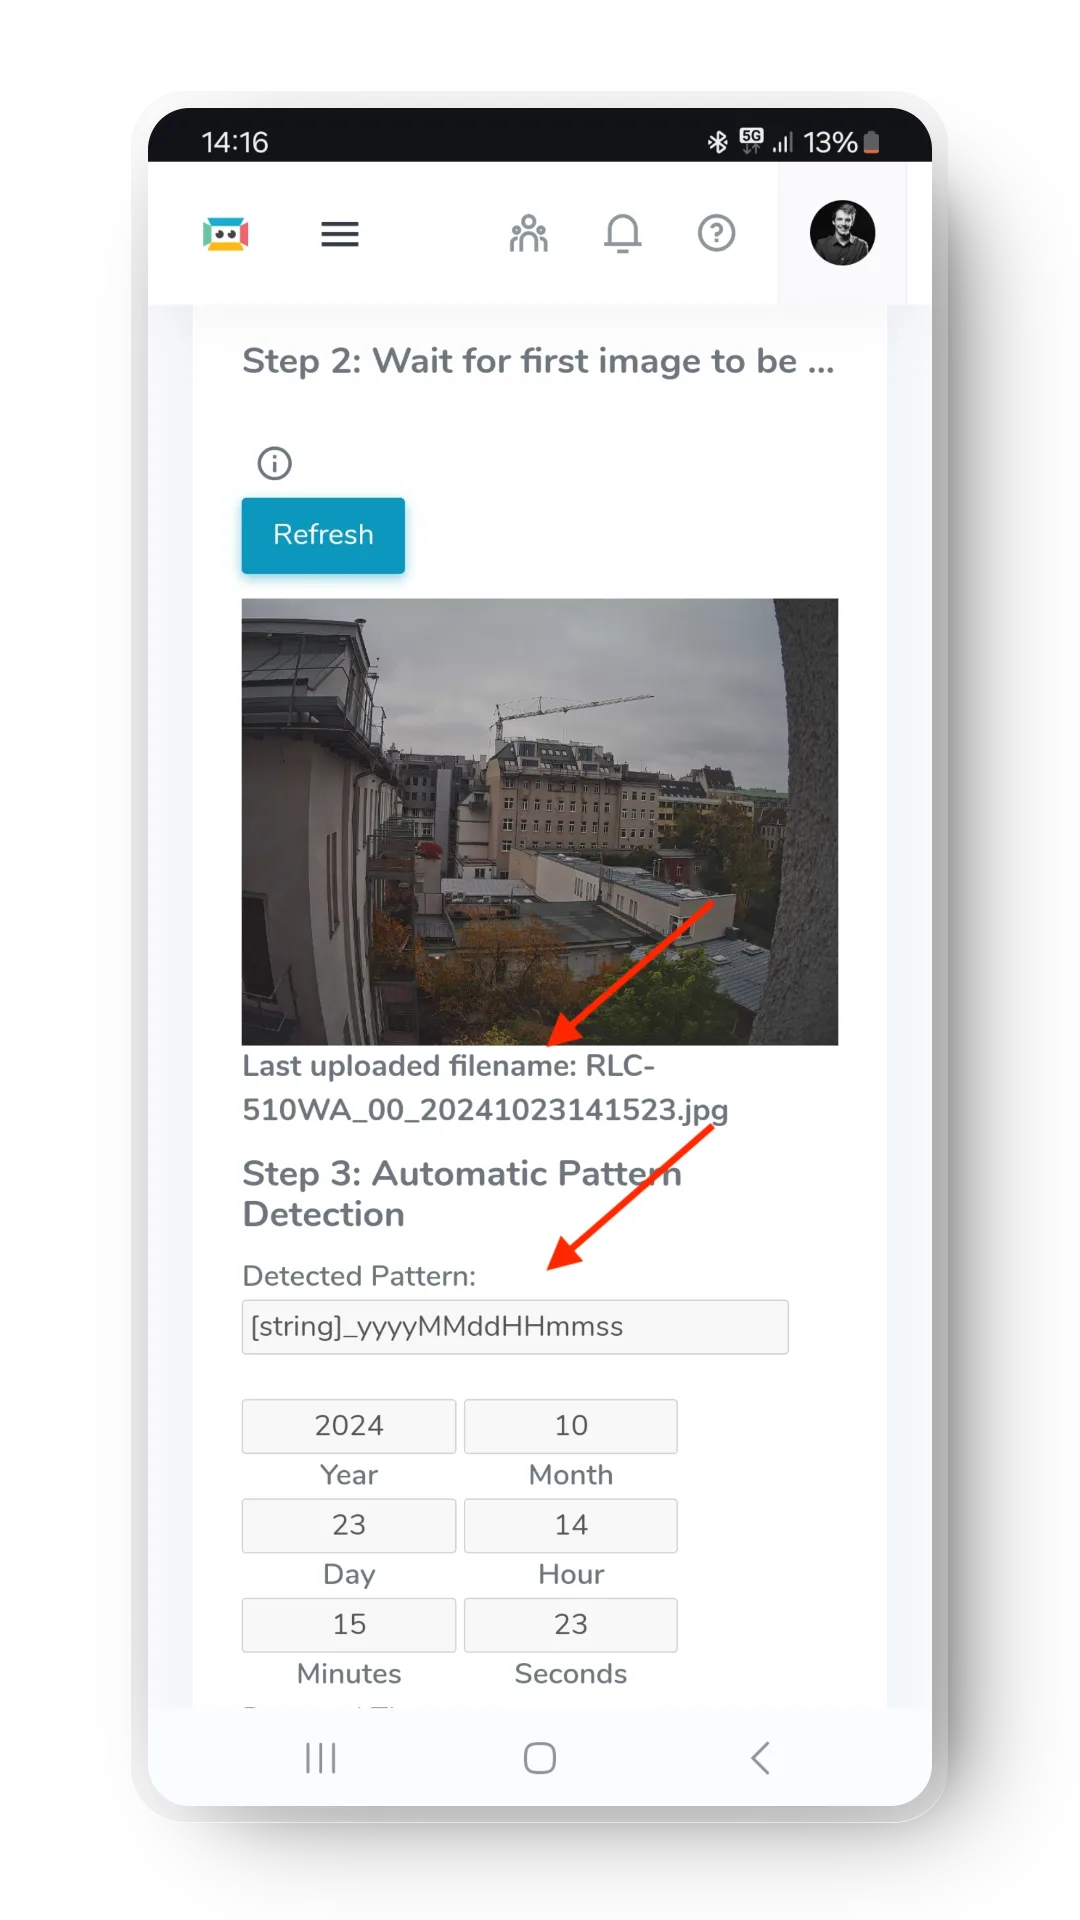
5. Wait for photos to upload
Your camera should start uploading photos to your TimelapseRobot account. Go back to your browser and wait for the first image to arrive (this can take 1–2 minutes). Then click Save Settings.
Your camera is now connected and uploads photos according to your schedule.
6. Optional: set your timelapse interval
By default the camera uploads one image per minute. To change this:
- Open the Reolink app and go to FTP Settings.
- Set the desired interval for the timelapse.
- Tap Save to confirm.
Get started
Ready to capture your construction project in timelapse?
Get the complete weatherproof kit — or start free with your own FTP/IP camera.