How to connect a Bixion camera to the TimelapseRobot Cloud
Connect your Bixion camera to TimelapseRobot via FTP in four short steps, including the correct filename format.
Follow these steps to connect your Bixion camera to the TimelapseRobot Cloud via FTP.
1. Get your FTP credentials from TimelapseRobot
Log in to TimelapseRobot at my.timelapserobot.com. Then:
- create a new project, or open an existing project
- click Add Camera
- select FTP Camera
- enter a camera name
- choose your subscription plan
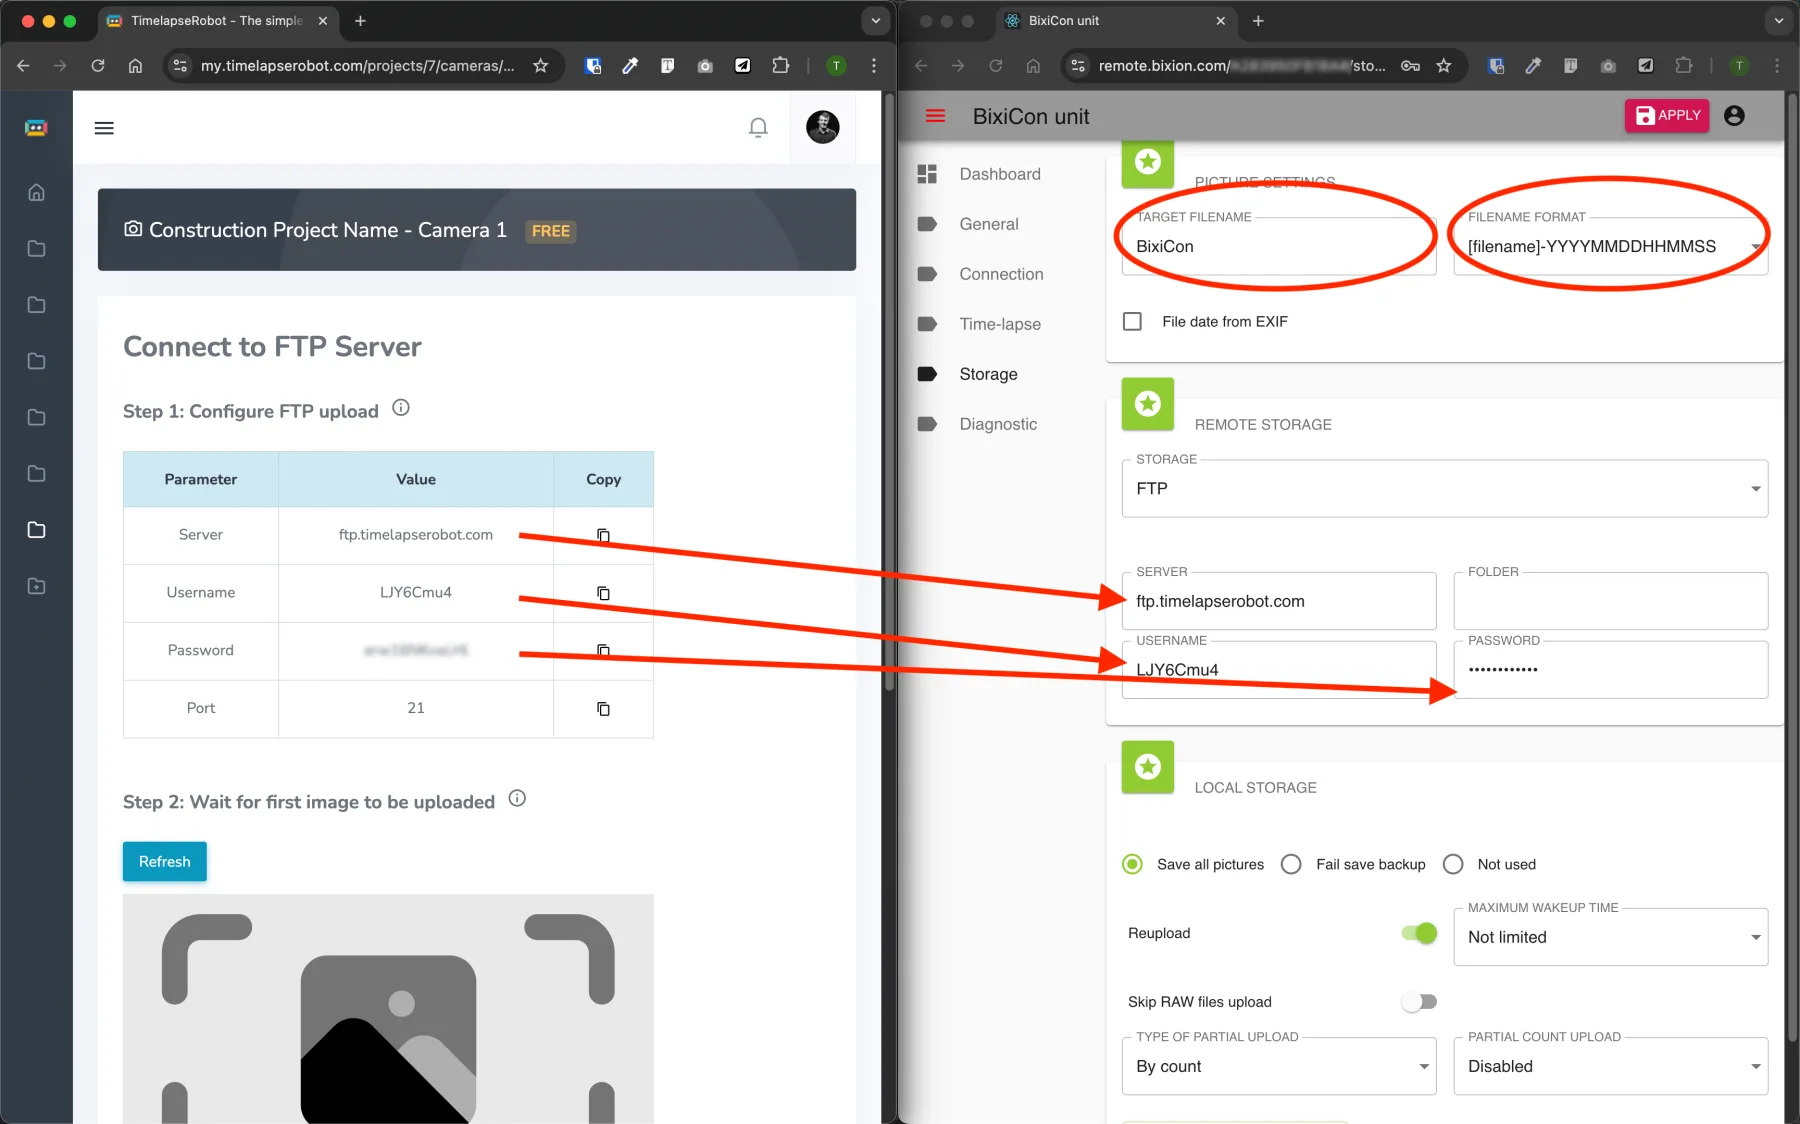
In the next step, TimelapseRobot provides the FTP server credentials for your camera connection. Keep this window open or copy the credentials — you will need them in the Bixion portal.
2. Configure your Bixion camera
Go to the storage settings of your Bixion camera. Then make sure that:
- the Target Filename does not contain any spaces
- the Filename Format is set to [filename]-YYYYMMDDHHMMSS
- the FTP credentials from TimelapseRobot are entered correctly
After that, click APPLY in the Bixion portal.
3. Wait for the first photo to arrive
Once the settings have been applied, the camera begins uploading images to the TimelapseRobot server. Wait for the first photo to appear in TimelapseRobot.
4. Confirm the detected naming pattern
As soon as the first image has been uploaded, TimelapseRobot automatically detects the file naming pattern. Then:
- select the correct camera timezone
- click Save settings
Your Bixion camera is now connected to TimelapseRobot and will continue uploading new photos automatically.
Get started
Ready to capture your construction project in timelapse?
Get the complete weatherproof kit — or start free with your own FTP/IP camera.