TLR-Bridge manual
The complete manual for the TLR-Bridge GoPro controller: LEDs and ports, pairing, the local setup page, internet, shootplan and file management.
1. Introduction
1.1 What the TLR-Bridge does
The TLR-Bridge is a dedicated controller for GoPro cameras used in time-lapse applications. It:
- powers and controls the GoPro
- resets the GoPro automatically if it freezes
- allows detailed scheduling of shooting times
- uploads photos to your TimelapseRobot account
- saves all photos locally to an SSD (optional)
- operates via Wi-Fi or LTE
- provides a local configuration page accessible from any phone, tablet or laptop
The device is designed for simplicity and long-term reliability.
1.2 Buttons, LEDs and ports overview

Status LED — indicates the general operating state:
- Blue: TLR-Bridge is booting
- Yellow: transitional boot step
- Green: ready for operation
- Red: an error has been detected
- Any solid color: the device is receiving power
Camera Connection Button — places the TLR-Bridge into pairing mode so it can connect to the GoPro via Bluetooth.
Camera Connection LED — indicates the GoPro connection state:
- Blinking purple: searching for or attempting to pair with the GoPro
- Blinking blue: successful Bluetooth pairing (GoPro paired but not yet controlled)
- Solid blue: GoPro connected via cable, powered and fully controlled
- Red: connection failed; the TLR-Bridge resets GoPro power
Setup Button — activates and deactivates configuration mode and opens the local setup page.
Setup LED — shows whether setup mode is active:
- Off: normal operation
- Solid green: configuration mode active / local setup page open
Internet LED — indicates internet connection status:
- Solid green: connected via Wi-Fi
- Blinking green: connected via LTE
- Solid red: no internet connection available
Device ID — printed on the bottom/front of the device. Used to access the local setup page and to link the device to your TimelapseRobot account.
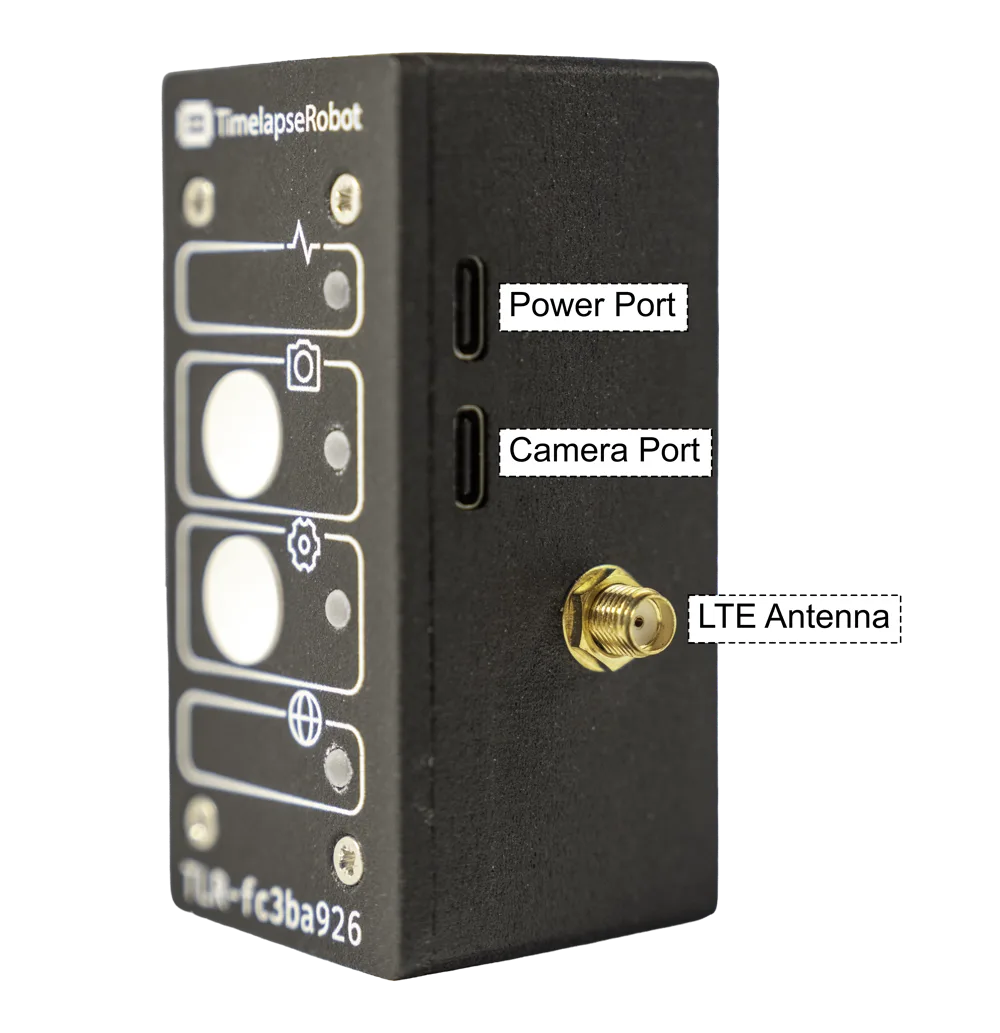
Ports:
- Power Port — connect the supplied power adapter here.
- Camera Port — supplies the GoPro with power and downloads photos.
- LTE Antenna — attach the LTE antenna if using a SIM card for mobile data.
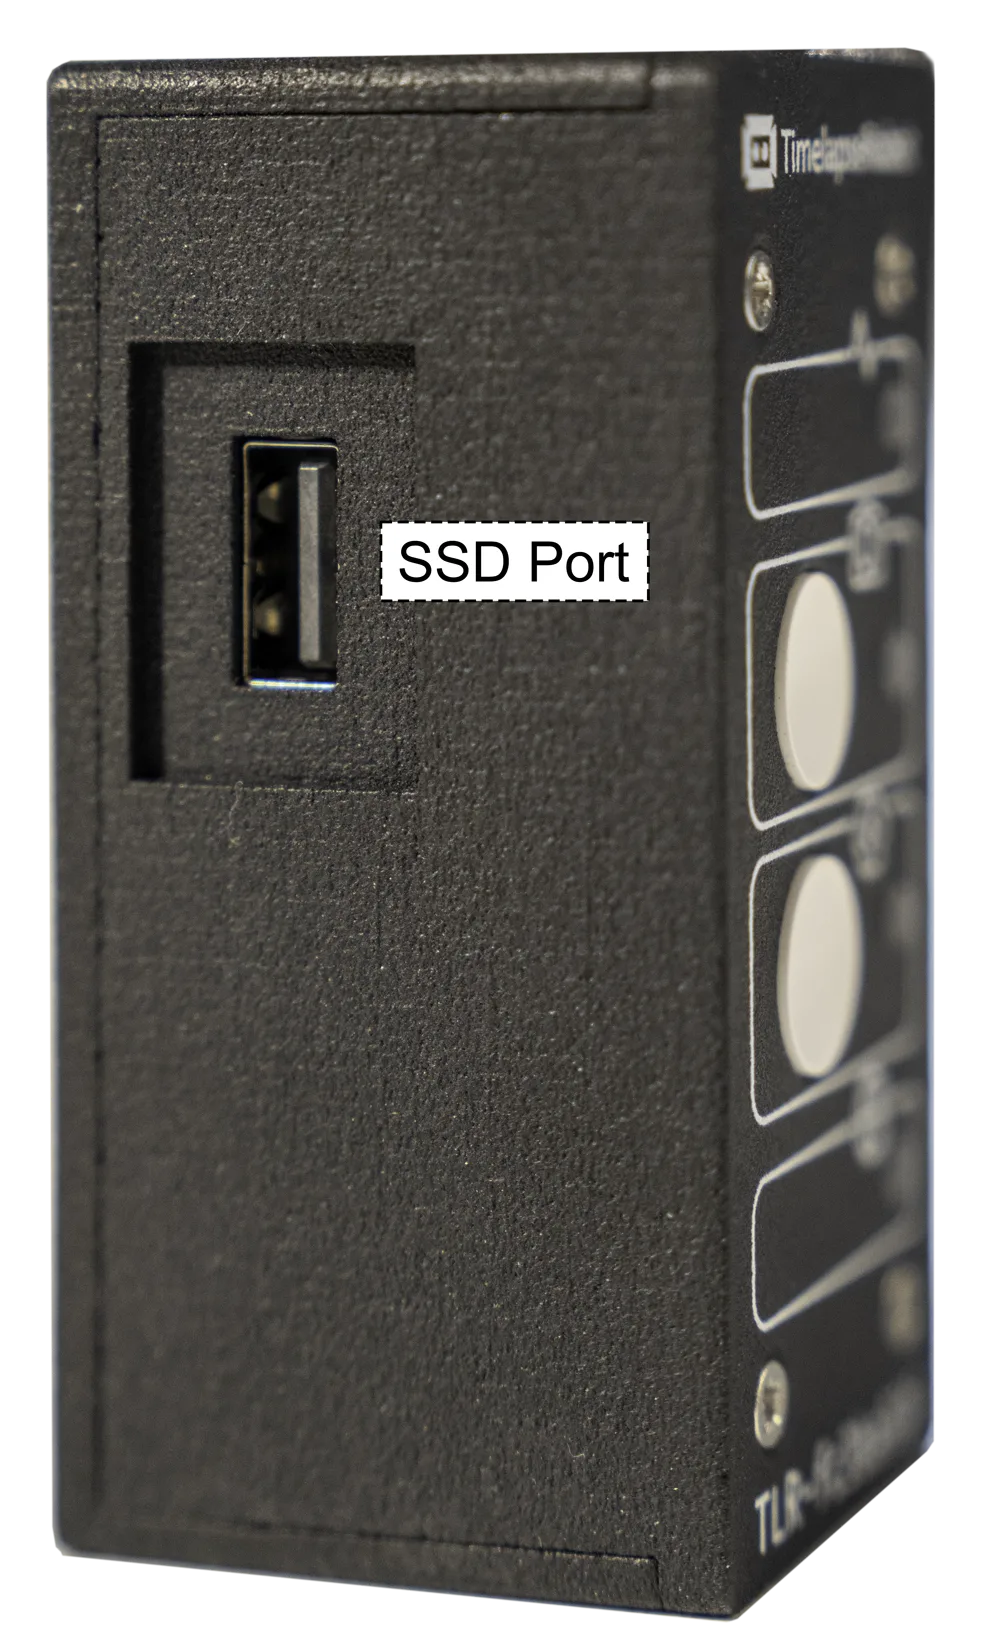
- SSD Port — connect an SSD here for local backup storage.
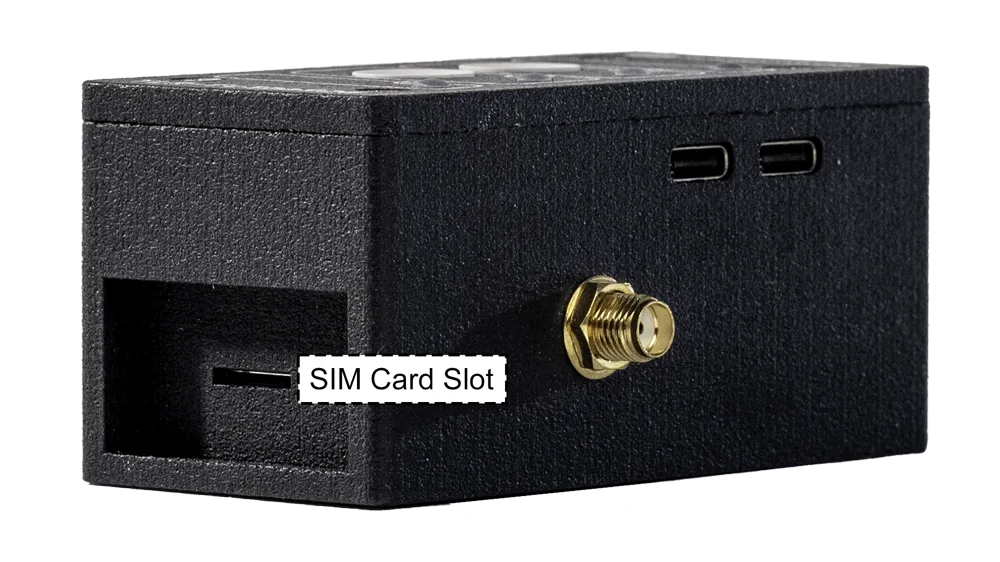
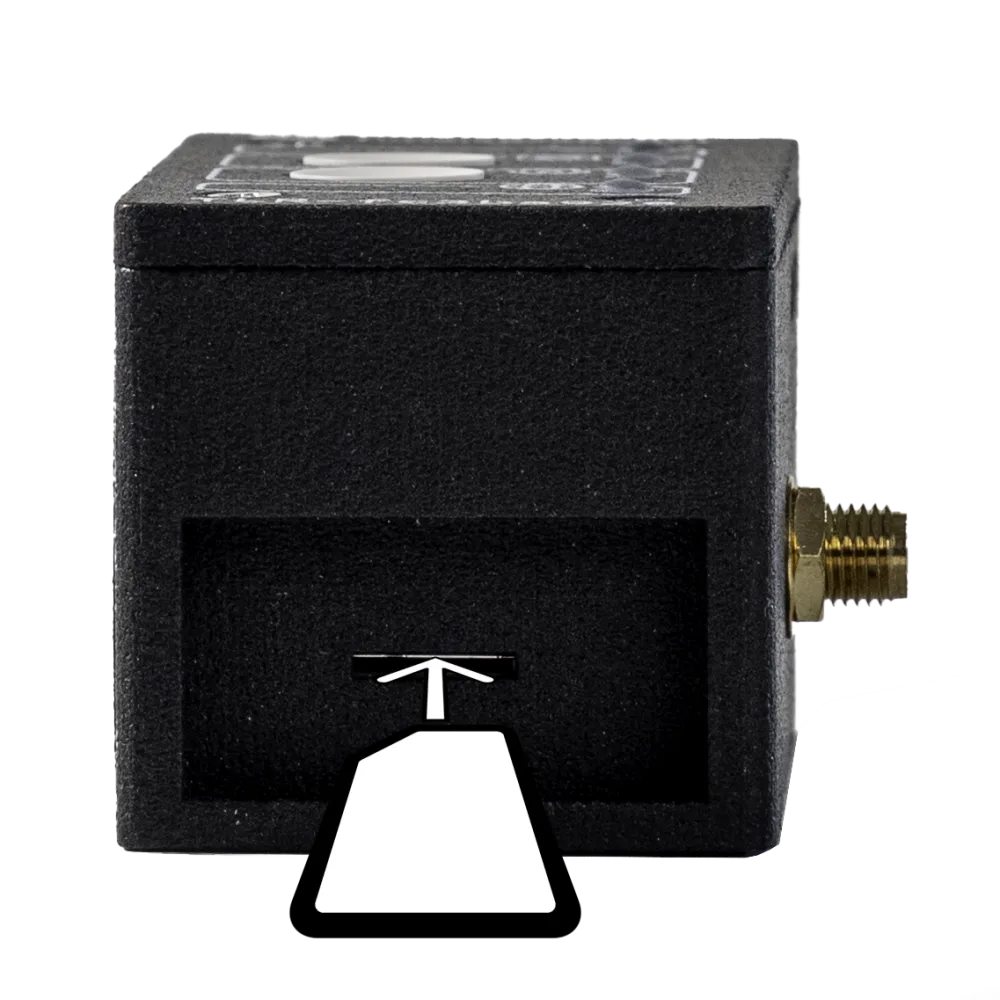
- SIM Card Slot — insert a SIM card for LTE use.
2. Getting started
2.1 What you need
To use the TLR-Bridge, you will need:
- a GoPro 12 or GoPro 13 with an SD card inside
- for pairing: the GoPro battery
- the supplied power adapter
- a smartphone, laptop or tablet
- a web browser (Chrome, Safari, Firefox, Edge, etc.)
- optional: a SIM card for LTE
- optional: an SSD for local storage backup
- optional: a TimelapseRobot account
2.2 Powering the TLR-Bridge
- (Optional) Insert a SIM card into the SIM Card Slot.
- Connect the supplied power adapter to the Power Port.
- Plug into a wall outlet.
- Watch the Status LED sequence: Blue → Yellow → Green.
- When green, the device is ready.
- If the Status LED stays red, restart the device. If the issue persists, contact support.
Important: only use the supplied power adapter.
2.3 Preparing the GoPro
Before pairing:
- ensure the GoPro is not yet connected to the TLR-Bridge via USB cable
- the GoPro battery should be at least 50%
- the latest GoPro firmware is installed
- an SD card is inserted
- no other TLR-Bridges are nearby in pairing mode
The TLR-Bridge must be in pairing mode:
- Status LED: solid green
- Camera Connection LED: blinking purple
To enter pairing mode, press the Camera Connection Button.
2.4 Pairing the TLR-Bridge with the GoPro
Before you start, reset the GoPro's wireless connections.
- Power up the GoPro.
- Swipe down to open the Dashboard.
- Swipe left until you see "Pair Device".
- Tap "Pair Device". The TLR-Bridge should be next to the GoPro, and pairing mode must be active (Status LED solid green, Camera Connection LED blinking purple). If it is not blinking purple, press the Camera Connection Button.
- The GoPro shows: "Ready to pair to the GoPro Quik app or other Bluetooth compatible device."
- Wait for pairing — this may take some time.
- After successful pairing, the GoPro briefly shows "Quik App" or "…", then returns to the "Ready to pair…" screen, and the Camera Connection LED changes from blinking purple to blinking blue (Bluetooth pairing successful, but the GoPro is not yet controlled by the TLR-Bridge).
- Remove the GoPro battery.
- Connect the GoPro to the Camera Port using the supplied USB-C cable.
- Within the next 60 seconds, the TLR-Bridge powers the GoPro and the Camera Connection LED becomes solid blue, meaning full control is active.
3. Local setup page
The local setup page is the configuration interface of the TLR-Bridge. You can access it from any device with a web browser (Chrome, Safari, Firefox, etc.). Internet is not required for this process.
3.1 Accessing the local setup page
- Press the Setup Button.
- The Setup LED turns solid green. The Internet LED becomes red because the internal Wi-Fi hotspot has no internet.
- On your phone, laptop or tablet, open your Wi-Fi settings and connect to the network named after your Device ID (e.g. TLR-fc3ba926). Smartphone users: disable mobile data to avoid interference.
- Open a web browser (Chrome, Firefox, Safari, etc.).
- Enter the address deviceID.local — for example, tlr-fc3ba926.local
- Enter your password. When setting up, you can find your default password on the back of the printed "First Steps" guide.
3.2 Setting the timezone
A pop-up reminder appears the first time if no timezone is set.
- Open Device Settings.
- Select the timezone.
- Click Submit.
3.3 Changing the password
- Go to Device Settings → Change Password.
- Enter the current password.
- Enter a new password.
- Confirm the new password.
- Click "Change my password".
- Wait for confirmation.
4. Connecting the TLR-Bridge to the internet
Internet enables remote control, automatic uploads and online monitoring. The TLR-Bridge can connect via LTE or Wi-Fi.
4.1 LTE connection
- Insert a SIM card.
- Restart the TLR-Bridge by unplugging the power cable.
- When LTE is active, the Internet LED blinks green.
4.2 Adding a Wi-Fi network
- Open the local setup page.
- Navigate to WiFi.
- View the available networks.
- Under "Add Connection", enter the SSID (Wi-Fi name) and password.
- Click Add.
- Exit setup mode by pressing the Setup Button.
- When connected via Wi-Fi, the Internet LED becomes solid green.
4.3 Deleting a Wi-Fi network
- Open the local setup page.
- Go to WiFi.
- Under "Connections", click Delete.
5. Camera control
5.1 Camera settings
Power Off Between Shots:
- Yes (recommended): the GoPro powers off after each shot for more stable long-term operation.
- No: the GoPro stays powered — not recommended for long-term time-lapse.
Click Submit to save changes.
5.2 Shootplan
The shootplan controls when and how often the GoPro takes photos.
To create a shootplan:
- Select the active weekdays (blue = active).
- (Optional) Enable "Set Start/Stop Time" and choose a time window.
- Set the interval (seconds or minutes).
- Click Submit.
Example — active: Tuesday, Wednesday; time: 08:00–22:00; interval: 5 minutes. The GoPro automatically wakes up, shoots and powers off according to these rules.
6. File management
6.1 Auto-delete after successful transfer
- Open the local setup page.
- Go to File Management → Camera Storage.
- Enable "Auto-delete from camera SD card after successful transfer".
- Click Submit.
This prevents SD card overflow.
6.2 Cloud uploads
- Open File Management → Cloud Strategy.
- Set Upload Mode to Instant.
- Choose the upload frequency:
- 1: upload every photo
- 2: upload every second photo
- 3: upload every third photo, and so on
- Click Submit.
6.3 Local backup to SSD
- Format the SSD to exFAT.
- Connect the SSD to the SSD Port.
- From this moment on, every new photo is saved to the SSD, independent of the cloud upload frequency.
7. Device management
7.1 Factory reset
- On the setup page login screen, click "Reset to factory settings".
- Confirm the warning.
- Wait for the operation to complete.
- If linked to TimelapseRobot, unlink the TLR-Bridge in your TimelapseRobot account before linking it to another project.
7.2 Connecting to the TimelapseRobot web interface
- Log in at my.timelapserobot.com.
- Open your project and click Add Camera.
- Select GoPro Camera and name it.
- Choose a subscription plan.
- Enter the Device ID (without "TLR-").
- Click Add Camera.
- The system asks you to bring the device online.
- Once the TLR-Bridge is online, the page refreshes automatically.
Your device is now ready for remote use.
Get started
Ready to capture your construction project in timelapse?
Get the complete weatherproof kit — or start free with your own FTP/IP camera.