Back to help center
TimelapseRobot Cloud·3 min read
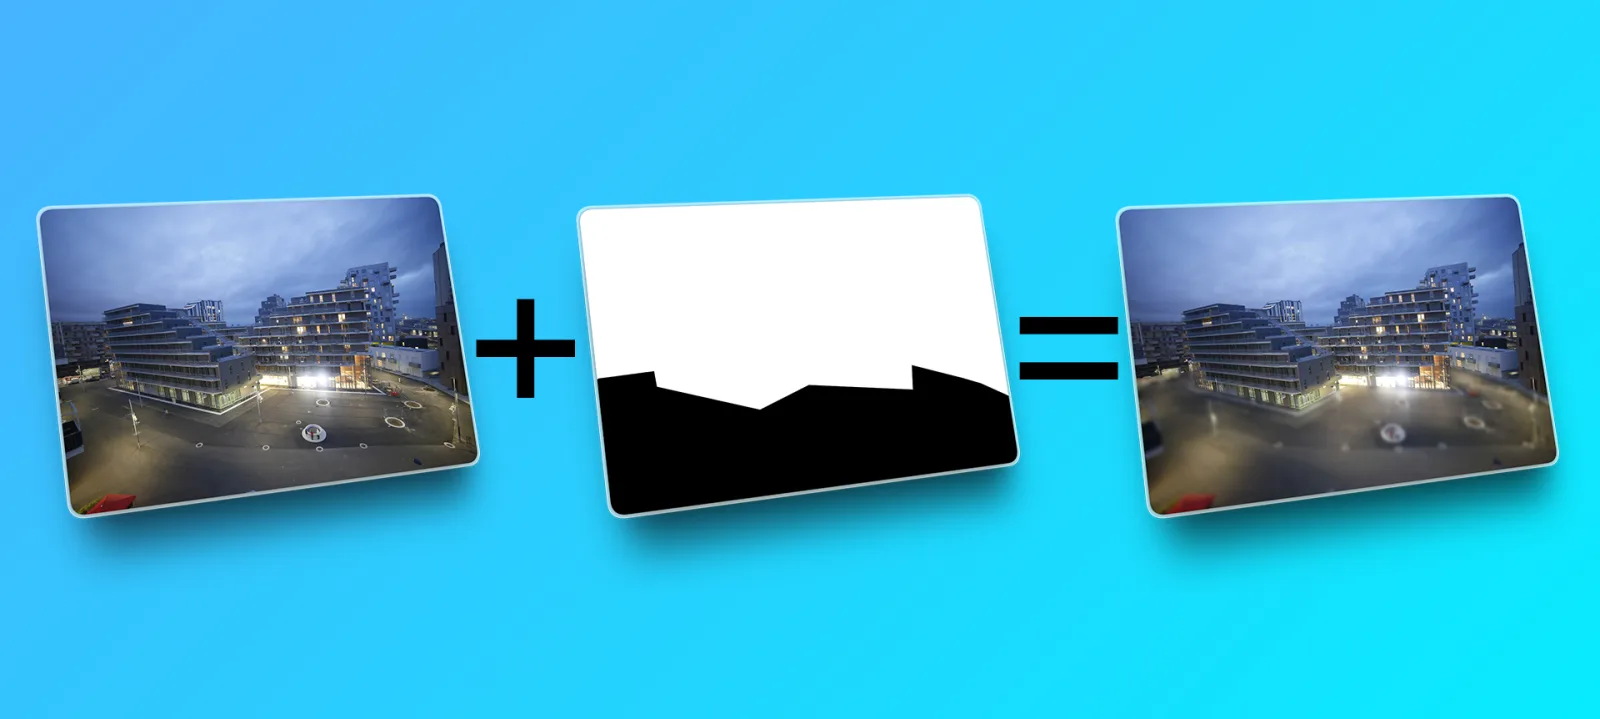
Area Blur: automatically blur parts of every image
Use a black-and-white mask to permanently blur windows, faces or private areas in every incoming photo from a camera.
Area Blur lets you automatically blur specific parts of every new image coming from your camera by using a mask file (a black-and-white image).
1. Download an original image (full resolution)
- Open the Gallery tab.
- Find an image from the camera you want to set up.
- Click the Download button next to the image.
- Make sure you downloaded the image in its original resolution (full size).
2. Create a mask file (black = blur, white = keep sharp)
Use any image editor (for example Photoshop, GIMP or Photopea) to create a mask:
- White areas will not be blurred — they stay sharp
- Black areas will be blurred
3. Export the mask correctly
When exporting the mask, make sure:
- File type: PNG or JPG
- Resolution: it must match exactly the original image resolution (same width × height)
If the resolution does not match, the blurred areas will not line up correctly.
4. Upload the mask in TimelapseRobot
- Go to the Setup tab of your camera.
- Open Image Manipulation.
- Enable Area Blur.
- Upload your mask file (PNG / JPG).
5. Save — and you're done
Click Save.
From this point on, every new incoming image from that camera will automatically be blurred where the mask is black.
Get started
Ready to capture your construction project in timelapse?
Get the complete weatherproof kit — or start free with your own FTP/IP camera.